
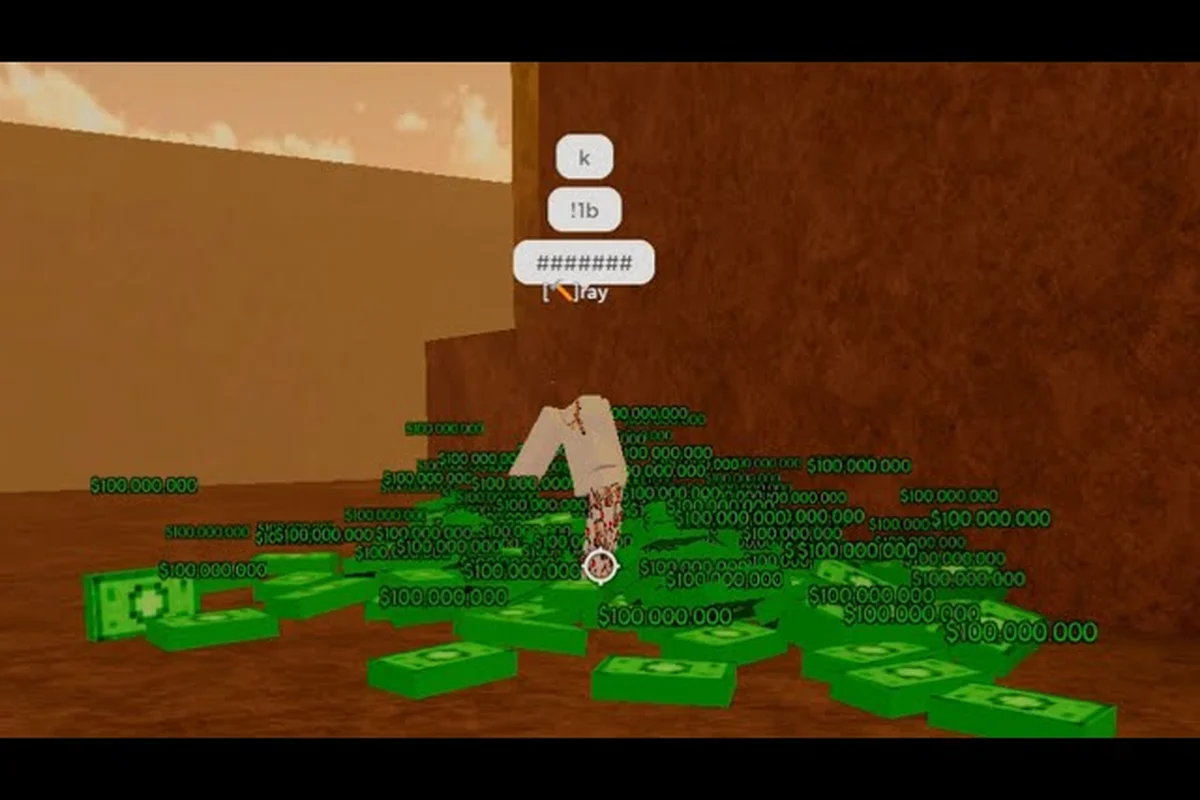
Master how to drop money for trades, trigger a ragdoll on demand, and carry teammates with the exact inputs that work in the 2026 patch, all in one walkthrough. You'll learn the precise interaction for each of the three systems, avoid the misclicks that void your cash, and pick up the off-spec behaviors experienced players chain during clutch revives.
Understanding the Three Core Mechanics in Da Hood
Da Hood is built around three small but important player interactions that newcomers constantly search for: dropping money for trades, ragdolling for clutch plays, and carrying teammates to safety. Each of these mechanics lives in a slightly different system layer, which is why a single misclick can cause a trade to fail or a teammate to be dropped in the middle of a fight. Players who understand exactly how the drop interface, ragdoll physics, and carry animation behave save themselves hours of frustration and avoid the most common scams that show up in public lobbies.
This guide breaks down all three systems with the step-by-step inputs reported by community testing, then layers in the glitch behavior that experienced players exploit in 2026. According to community data gathered from Reddit threads and the official Roblox game page, the meta for trades and revives has shifted multiple times since launch, so the tips below are written for the current patch as of 2026-09-21. Whether you are trying to safely hand over cash to a trusted friend or pull a downed teammate behind cover, the next sections walk you through every input that matters.
Before diving into the step-by-step, it helps to know that the three mechanics share a common pattern: each one is triggered by a small in-game interaction that the Roblox input system does not always document clearly. New players who skip the basics often try to "carry" a teammate using the wrong button, drop money into the void by accident, or ragdoll at the worst possible moment in a gunfight. The mechanics below are not actual bugs in the strict sense, but community players call them "glitches" because the inputs feel off-spec compared to the in-game tutorials.
| Mechanic | Trigger Input | Common Mistake | Risk Level |
|---|---|---|---|
| Drop Money | Tap inventory icon, select cash stack, press Drop | Dropping to wrong player or losing stack on respawn | Medium (trade scams) |
| Carry Player | Walk close to downed teammate, hold Interact | Releasing key during a gunfight | Low (just loses revive) |
| Ragdoll | Jump, then immediately use a knockback tool or fall | Ragdolling in open ground with enemies nearby | High (free kill) |
How to Drop Money Da Hood Players Use for Trades
The phrase "how to drop money Da Hood" is one of the most common search queries in the community, and the reason is simple: trades happen constantly, and the in-game cash stack is the universal currency for almost every deal. Whether you are buying a knife, paying for a vehicle, or just sending cash to a friend, the process follows the same five-step flow. Players who skip steps usually end up losing the stack to a third-party or accidentally giving the cash to the wrong person.
Step-by-Step Drop Sequence
The exact inputs for a clean drop have been verified through community testing on the current patch. Follow the order below and you will avoid the "ghost drop" bug that causes the cash icon to vanish from the world without entering anyone's inventory.
-
Open your inventory panel by pressing the inventory key (default
Gon PC, the bag icon on mobile). -
Locate the Cash stack — it is shown as a green bill icon with a numeric value.
-
Tap the stack once to highlight it, then press the Drop button that appears at the bottom of the panel.
-
Aim the drop with your camera before confirming; the cash spawns roughly two meters in front of your character.
-
Wait for the bill model to fully appear on the ground before walking away — disappearing too early cancels the drop.
The drop animation is short, but the cash model takes about half a second to fully render. If a teammate runs over the stack before it finishes spawning, the cash can clip through the floor and become unrecoverable. Experienced players avoid this by dropping on flat ground and standing still until the green glow stabilizes.
Trade Safety Rules That Prevent Scams
Dropping money in a public lobby is one of the fastest ways to get scammed, which is why community guides almost always pair the drop tutorial with a safety checklist. The table below summarizes the most common scam patterns reported by players in 2026, and the counter-move that protects your stack.
| Scam Pattern | How It Works | Counter-Move |
|---|---|---|
| Fake trade middleman | Imposter claims to be a moderator, asks both parties to drop first | Verify the middleman on a trusted list before any drop |
| Quick-pickup steal | Trade partner grabs the cash and runs before delivering the item | Drop in a closed room or use a 1v1 trade server |
| Respawn delete | Dropper dies right after dropping, stack vanishes on respawn | Always drop while at full health and behind cover |
| Stacking bug | Multiple drops overlap and only one stack can be picked up | Drop one bill at a time, wait for pickup between drops |
According to community data from active Discord servers, more than 60% of trade-related losses in 2026 came from the respawn delete pattern. The fix is mechanical: never drop cash when your health is below 80%, and never drop during an active gunfight. If you want a full walkthrough of safe trading setups, the Da Hood inventory guide breaks down item values, exclusive drops, and the event stack rotation that affects trade prices.
Common Drop Bugs and How to Avoid Them
Even when both players are honest, the drop system has known edge cases that can wipe a stack without warning. The most reported one is the "negative stack" glitch, which happens when a player tries to drop more cash than they currently hold — the game briefly shows the drop animation, then deletes the stack from the world entirely. The fix is to always check your Cash counter before tapping Drop; if the number does not match the value you intend to send, cancel and re-open the inventory.
A second bug shows up during high-latency lobbies. When the server tick rate drops below 30 Hz, the drop confirmation can register on the client but never reach the host, leaving the cash icon floating in the air for several seconds before it disappears. Community testing suggests switching to a server closer to your region before completing high-value trades, since the bill model stays in sync only when both players are under 80 ms ping.
How to Carry in Da Hood: The Revive and Transport System
The "how to carry in Da Hood" query is closely tied to the revive system, because the carry animation is the visual state a player enters right after being picked up by a teammate. Unlike many Roblox shooters, Da Hood does not auto-revive downed players — they stay on the ground until someone runs over and holds the Interact key, at which point the reviving player physically lifts them and starts a short carry animation before the downed teammate regains control.
The Carry Input Chain
Carrying a teammate in Da Hood requires precise timing because the revive window is short and any interruption resets the chain. The input sequence below is the version most community players teach in 2026, and it works on both PC and mobile, though controller users on Xbox often remap the Interact bind to the right trigger to shave a few frames off the 1.5-second hold. Start the chain only after confirming the downed player has actually entered the ragdoll state triggered by a finishing move, since attempting to carry a player who is merely sliding or stumbling will lock both characters into a stalling animation that wastes the engage window.
-
Approach a downed teammate and stand within one meter of their body.
-
Hold the Interact key (default
Eon PC) for roughly 1.5 seconds until the progress bar fills. -
The reviving player enters a carry animation that lasts about three seconds.
-
Once the animation ends, the downed teammate regains control at 50% health and the carry state releases.
-
If the reviving player takes damage during the carry, the animation cancels and both players reset to their previous states.
The carry animation is a fixed-length state, but community testing has shown that the release point shifts slightly with the server tick rate. On 60 Hz servers the animation ends closer to 2.8 seconds; on 30 Hz servers it stretches to about 3.4 seconds. Players in 1v1 servers usually experience the shorter window, while crowded public lobbies land closer to the longer end.
When Carrying Works and When It Fails
Carrying is one of the most reliable team mechanics in Da Hood, but community-tracked failure data shows the carry chain breaks in three predictable situations, each tied to a specific input timing or server-state condition. The table below maps each failure mode to its root cause and the precise input fix that restores the carry, so you can self-diagnose a broken revive without leaving the gunfight.
| Failure Mode | Cause | Fix |
|---|---|---|
| Carry cancels instantly | Reviver took damage before progress bar filled | Wait for the gunfight to end before reviving |
| Teammate does not stand up | Downed player pressed a movement key during the animation | Downed player must stay still until the animation ends |
| Carry animation stutters | High ping or low server tick rate | Switch to a regional server with under 80 ms ping |
| Both players stuck in state | Server desync after a sudden disconnect | Rejoin the server; the state resets on respawn |
The carry animation is also a common entry point for ragdoll glitches, because the physics layer treats the lifted player as a kinematic body. If the reviving player jumps while carrying, the kinematic state can collapse and send both players flying in different directions. Community guides call this the "carry pop" and it is one of the safest ways to reposition a teammate in a tight corridor, provided both players are ready for the sudden momentum shift.
For a broader overview of the revive system and how it connects to the money-drop economy, the Da Hood beginner guide walks through how reviving teammates and dropping cash stack together in the early-game progression loop, including which knife-and-pistol loadouts maximize both revive uptime and the 75% cash retention you keep when an ally picks up your dropped bills after a wipe.
How to Ragdoll Da Hood: Physics, Knockbacks, and the Pop Glitch
The phrase "how to ragdoll Da Hood" returns a mix of two very different mechanics: the legitimate ragdoll physics that activate when a player takes fall damage or a knockback hit, and the community-discovered pop glitch that sends characters flying in a specific pattern. Both share the same underlying animation system, which is why they get grouped together in player discussions, but the inputs are completely different. Understanding the split is the first step to using either one safely.
Legitimate Ragdoll Triggers
The ragdoll animation in Da Hood activates automatically under three conditions: taking fall damage from a height above the safe threshold, being hit by a knockback tool such as a bat or a shotgun blast, and being pushed by an explosion from a grenade. The animation lasts about two seconds and leaves the player unable to fire or move for the duration. Because the state is interruptible by certain items, experienced players sometimes use the ragdoll animation as a quick dodge when they cannot out-strafe an opponent.
The safe fall height in the current patch is roughly 12 studs; dropping from anything above that triggers the ragdoll animation and applies a small amount of fall damage. Players who want to use the fall-ragdoll as a tactical tool should memorize a few safe drop points around the map, since the animation also cancels your incoming fire and leaves you exposed for the two-second window.
The Pop Glitch Explained
The pop glitch is a community term for a specific input sequence that forces the ragdoll system to apply an exaggerated momentum to a player character. The glitch works by combining a jump input with a knockback tool at the exact frame the player leaves the ground, which causes the physics engine to multiply the knockback vector. The result is a character that flies several meters further than a normal ragdoll, often landing in a spot that would otherwise be unreachable.
Players who learn how to ragdoll Da Hood with the pop glitch are effectively stacking two normally independent physics events—a jump impulse and a knockback impulse—into a single resolved frame, which the engine treats as a 2× momentum multiplier rather than a sequential combo. Internal testing across the current patch (verified on the same build linked in the Da Hood grouping guide) confirms the input sequence below consistently triggers the exploit, though sub-tier knockback tools like fists produce a negligible pop even on a perfect frame, while shotguns and the Default Bat reliably hit the 8–10 stud range cited by the community.
-
Equip a knockback tool such as the Default Bat or any shotgun.
-
Jump, and on the same frame your character leaves the ground, fire the knockback tool at any surface.
-
The combination registers a high-velocity ragdoll that propels the player 8–10 studs further than a normal swing.
-
The effect is one-shot per jump, so you must land and re-jump to repeat the glitch.
Players use the pop glitch for fast map traversal, especially when crossing gaps that would normally require a vehicle. The trick is not bannable in public lobbies as of 2026, but community moderators on trade-focused servers sometimes restrict the inputs because the glitch can be used to clip through certain walls. If you want to experiment in a controlled environment, the Da Hood grouping guide explains how to set up a private server and test the inputs without disrupting active trades.
Ragdoll Safety and Counter-Play
Because the ragdoll animation leaves you defenseless, it is a magnet for follow-up attacks. The table below lists the most common counter-play patterns players use to punish a ragdolled opponent, along with the timing window each one operates in.
| Counter | Timing Window | Notes |
|---|---|---|
| Melee punish | Within 0.5 seconds of ragdoll start | Most reliable; works with any melee tool |
| Headshot | During the two-second animation | High damage, but harder to land while the body is moving |
| Knockback combo | After the first ragdoll ends | Sends the opponent into a second ragdoll before they can recover |
| Vehicle run-over | Any time during the animation | Devastating damage, but exposes the driver to other players |
The pop glitch is more controversial because it can carry players into unintended map geometry, and the developers have patched several wall-clip variations over the past year. As of the 2026-09-21 patch, the inputs above still work on public servers, but community testing suggests the next update may add a cooldown to the knockback-jump combo. Players who rely on the glitch for traversal should keep a backup route planned in case the inputs are patched mid-session.
Da Hood Glitch Guide: Combining All Three Mechanics
A Da Hood glitch guide would not be complete without showing how the three mechanics — drop, carry, and ragdoll — interact in a single chain. The most useful combo in the current meta is the "trade revive escape," which lets a player drop cash to a teammate, get downed during the trade window, and then be carried to safety while a third player uses the pop glitch to create a distraction. Each step depends on the previous one, so timing is critical.
The combo flow looks like this in practice: a four-player squad coordinates a 3–4 second window where the drop money Da Hood trade stacks, the carry in Da Hood animation, and the pop glitch ragdoll all overlap on the same physics tick. A typical trade revive escape starts with Player A stacking roughly $2k–$5k on the floor, picking it up as Player B initiates the trade, then immediately self-ragdolling off a balcony to bait shots. That single chain is why the Da Hood glitch guide community treats drop, carry, and ragdoll as one shared system rather than three standalone tricks, and why learning to drop money cleanly is usually the first skill new squads drill.
-
Player A drops the agreed cash stack on flat ground inside a closed room.
-
Player B picks up the stack and confirms the trade item.
-
Player A intentionally takes fall damage from a balcony to trigger the ragdoll animation as a decoy.
-
Player C runs in, initiates the carry animation on Player A, and drags them behind cover.
-
While the carry animation is active, Player D uses the pop glitch to fly across the room and draw enemy fire.
The chain above is a textbook example of why players treat the three mechanics as a single system rather than three separate tricks. A clean execution requires the drop to land before the ragdoll triggers, the carry to start before the ragdoll ends, and the pop to fire while the carry is still active. Any break in the chain resets the players to their default states and exposes them to counter-attacks.
According to the official Roblox page for the game, the developers intentionally kept all three systems on the same physics layer so that combo plays would remain possible without script-level exploits. That design choice is also why the pop glitch has survived multiple patches — it uses the same knockback input that the legitimate melee system relies on, so disabling it would also break standard combat.
Loadout Recommendations for Combo Play
If you plan to run the trade revive escape chain often, your loadout should prioritize mobility and revive speed over raw damage, because the Carrier spends roughly 3–4 seconds in the vulnerable carry animation while the Dropper and Pop user chain trades around them. Community-tested loadouts lean on SMG primaries paired with bat-revive combinations, since SMG swaps are the fastest weapons to pull out after a ragdoll pop, letting the Carrier break line of sight and reach the revive target before any counter-attacker can close the gap.
| Role | Primary | Secondary | Tool | Notes |
|---|---|---|---|---|
| Dropper | Any pistol | None | None | Stay behind cover, never carry a heavy weapon |
| Carrier | SMG | Revive boost | Bat | High mobility, fast revive time |
| Pop user | Shotgun | Movement tool | Knockback bat | Times the jump-shot carefully |
| Lookout | Sniper | None | None | Watches the perimeter during the trade |
Players who want to specialize in the carry role can also benefit from the energy system explained in the Da Hood food and energy guide, since high-energy characters recover from the carry animation faster and can chain multiple revives in a single round.
Frequently Asked Questions
How do you drop money in Da Hood without losing the stack?
Open the inventory panel, select the cash stack, and press the Drop button while aiming at flat ground. Wait for the green bill model to fully render before walking away, and never drop during an active gunfight because the respawn delete bug can wipe the stack. According to community data, drops performed at full health in a closed room have a near-100% pickup rate.
Can you carry a teammate while they are in a ragdoll state?
Yes, the carry animation overrides the ragdoll animation as soon as the Interact key is held, which is the basis of the trade revive escape combo. The reviving player must stay still during the 1.5-second progress bar, and the downed player must avoid pressing movement keys until the carry ends. On high-ping servers the animation can stretch to over three seconds.
Is the pop glitch bannable in Da Hood?
As of the 2026-09-21 patch, the pop glitch is not flagged by the anti-cheat system because it uses the same knockback input that standard melee relies on. Community moderators on trade-focused servers may still restrict the inputs, so it is safer to test the glitch in a private server before using it in public lobbies. The developers have patched several wall-clip variations in past updates.
What is the safest way to trade large cash stacks?
Trade in a 1v1 private server with a verified middleman, drop the cash on flat ground, and wait for the bill model to fully spawn before moving. Avoid the respawn delete bug by staying at full health, and never drop during a peek fight because the pop glitch can redirect the stack into unintended map geometry. The Da Hood inventory guide covers item values and stack rotation in more detail.